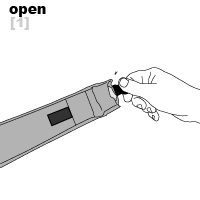
Open the end of the leading strut sleeve.
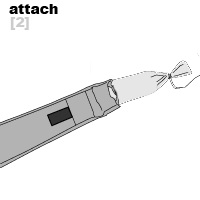
Attach a flying line at the end of the strut bladder. Make sure the line is attached correctly in order to pull the strut out and at the same time pull the flying line in.
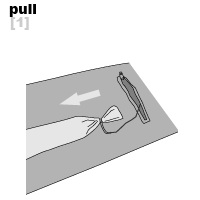
Pull the strut kite bladder out from the trailing edge of the kite (velcro or zipper opening) while pulling the flying line in. Remember to leave the flying line in for easy assembly of the new strut bladder.
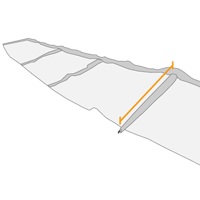
2. How to measure a strut?
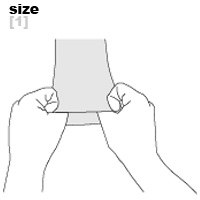
Strut bladders are measured from tip to tip as illustrated. If your strut bladder has been removed from the kite you can measure the original bladder from tip to tip. If you don't have the original bladder or the bladder is still in the kite, you can measure the kite.
Make sure that the U-stick bladder is larger than the original bladder in both length and diameter. You can easily confirm that the U-stick bladder is larger by laying the original bladder on top of the U-Stick bladder. Slide the original bladder as far forward as possible. Once assembled you want any excess length to be at the tail of the strut not at the head of the strut.
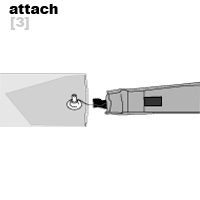
3. How to mark and attach a valve?
Check out the explanation below to find how how to attach a valve on your new strut bladder.
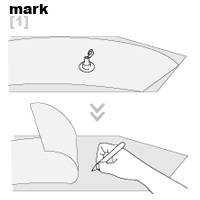
Lay the original bladder directly on top of the U-Stick replacement bladder. mark the exact location of the valve with a felt tipped marker. the marking should indicate plug arm position if it's important.
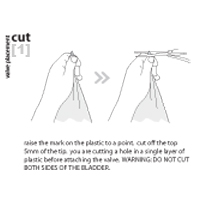
After you have setup the precise location of the valves. Carefully cut out a small hole where the valve will be placed. Be careful not to cut both sides.
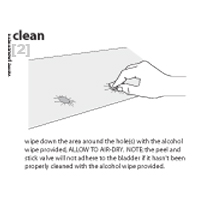
Wipe down the area around the marking with the alcohol wipe provided, ALLOW TO AIR-DRY.
note: the peel and stick valve will not adhere to the bladder if it hasn't been properly cleaned with the alcohol wipe provided.
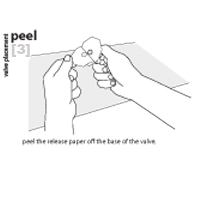
Peel the release paper off of the base of the valve. Don't touch the sticky side of the valve.
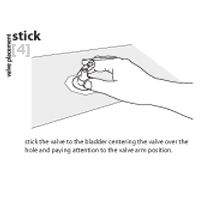
Stick the valve(s) to the bladder paying attention to the marking(s) and the valve arm position. Keep the bladder on a flat surface and watch out for wrinkles.
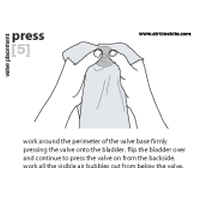
Work around the perimeter of the valve base firmly pressing the valve onto the bladder. flip the bladder over and continue to press the valve on from the backside. work all the visible air bubbles out from below the valve
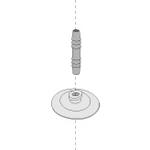
The OPTION valve is designed to replace over 50 percent of all One-Pump valves out on the market today. Using the straight or I-Connector you will be able to repair Slingshot kites and other kites using the straight valve.
Tip: When installing the connector in the valve make sure not to press too hard as you might damage the backside of the strut.
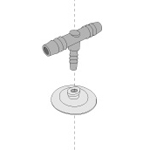
The OPTION valve is designed to replace over 50 percent of all One-Pump valves out on the market today. Using the T-Connector you will be able to repair the North 2-Pump system and other kites using the T-Connector.
Tip: When installing the connector in the valve make sure not to press too hard as you might damage the backside of the strut.

The OPTION valve is designed to replace over 50 percent of all One-Pump valves out on the market today. Using the elbow or L-Connector you will be able to repair Cabrinha, F-One and other kites using the elbow valve.
Tip: When installing the connector in the valve make sure not to press too hard as you might damage the backside of the strut.
5. How to assemble a new strut?
Strut bladders work as membranes only and must be contained by the sewn sleeve of the strut. Struts are usually inflated to between 6psi and 10psi. A bladder not contained and supported by a sewn outer sleeve will swell and burst with just 2psi. A bladder that is twisted or short will swell until it is restricted by the sewn sleeve or bursts. Make sure that the bladder is supported at all points by the sewn sleeve and does not need to stretch to fill any voids.
If the U-Stick bladder is longer than the original, you can shorten the length of the bladder by inverting the end of the bladder back inside itself.

Invert the head of the strut back inside itself regardless of the size difference between the U-Stick replacement bladder and the original bladder.
Run a flying line in the inflation valve hole and out the tail of the strut. Tie the flying line off to the valve.
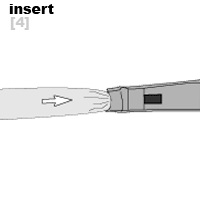
Pull the bladder into the strut sleeve by the flying line. you may need to push the valve into the tail of the sleeve with your fingers before pulling with the flying line.
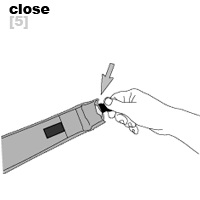
Make sure the bladder end extends all the way to the end of the bladder sleeve and that the bladder end is properly secured when the sleeve end is closed.
Seat the valve in the hole in the strut sleeve. before inflating the bladder you need to shake the bladder down to fill the void in front of the inflation valve. hold the tail of the strut sleeve and repeatedly shake the bladder down towards the end with a number of brisk jerks.
After placing the bladder in the right position. Pump the strut. Make sure the strut is not twisted. Look for small wrinkles when pumping.